The Xbox One console, along with the Xbox Series X | S, features the ability to remotely play Xbox games on your computer or smartphone. This feature is a popular selling point for the Xbox console. The Xbox Companion app generally does a good job of automatically detecting your console, but occasionally, it falls short.
In these situations, it will ask you to enter the IP address of your Xbox. Some people exclusively use the remote play function and do not have their console connected to a TV. In this situation, you will need to locate the IP address from your computer or smartphone. This process is straightforward using either the Xbox Companion App or an IP scanner app.
Table of Contents
Option :1 Find Your Xbox in Your Router’s List of Devices
This is likely going to be the fastest option for most people assuming that they know the login information to get into their router’s admin dashboard. To find your Xbox in your router dashboard, here is what you need to do.
- Open a web browser on your computer and enter your router’s IP address into the address bar. In many but not all cases, it’s one of the following 192.168.1.1, 192.168.0.1, 192.168.2.1, 10.10.0.1, or 10.0.0.1.
- Enter your router’s login credentials to access the configuration page.
- Once get into your router’s configuration page, click on “DHCP” or “LAN” settings.
- Look for the Xbox on the list of connected devices and find its IP address.
This method can be completed in as little as a minute, provided that you know the login information for your router. If you are having trouble logging in, look for a sticker on the router with the default password.
Some routers also use a generic default password that you can find online or in your router’s user manual.
Option 2: Use an IP Scanner App
If you are unable to log in to your router, using an IP scanner tool is an alternative that is also fast and easy. You can do this on your computer or on a mobile device using a free IP scanner app from the App or Google Play Store.
To find your Xbox IP address without a TV using an IP scanner, follow the steps outlined below.
Step 1) Power on Your Xbox Console
Press the power button on your Xbox console and make sure it powers on. The console must be powered on for the following procedure to work properly.
Step 2) Ensure Your Xbox is Connected to Your Network
If your Xbox has been previously connected to your Wi-Fi, it should connect automatically, assuming your Wi-Fi SSID or password has not changed. If your Wi-Fi configuration has changed, you will need to temporally connect your console to your network with an ethernet cable or connect a TV and reconnect to your Wi-Fi network. Any TV with HDMI support will work just fine for this step.
If you are already using ethernet, simply make sure the cable is firmly connected to your Xbox One or Series X | S console and to your router or switch.
Step 3) Download a Free IP Scanner Tool
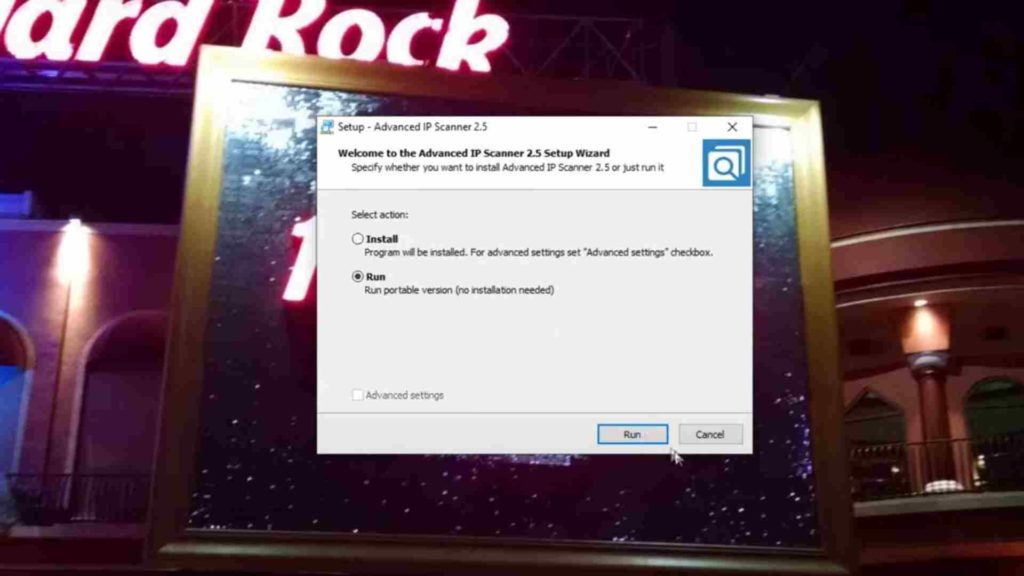
From your computer, download a free IP scanner tool. You can also do this on your smartphone if you prefer. However, it is easier on a computer. The IP scanner I recommend is called Advanced IP Scanner.
From this point, you will want to download the IP scanner. If you are using the tool I recommend, you have the option of running a portable version of the software, which doesn’t leave anything on your computer after you are finished using the program.

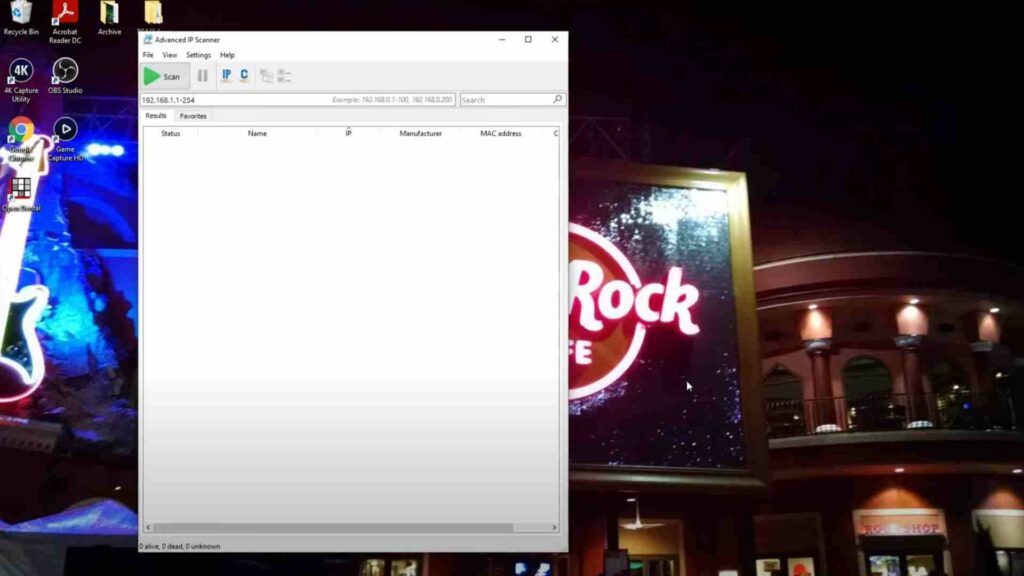
Step 4) Run the Scan
Press scan and allow the software to scan your network for devices. This will usually take between 30 seconds and a minute to complete. Generally, you do not need to change the IP address range that is being scanned.
The software, by default, scans the same network that your computer is connected to. Assuming your Xbox is connected to the same network, it will show up in the scan results.

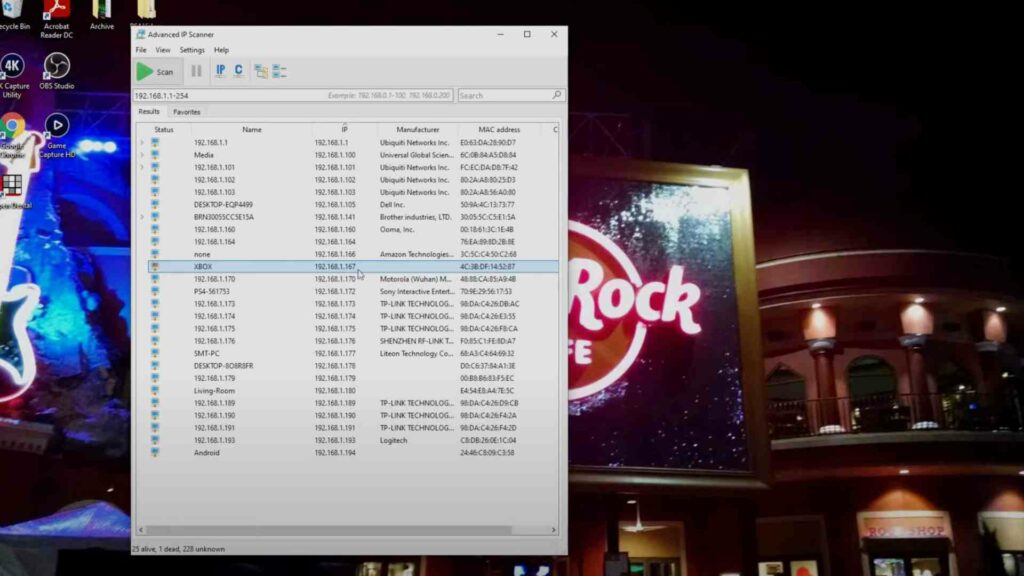
Step 5) Find Your Xbox in the List of Discovered Devices.
When the scan finishes, you will get a list of devices found on your network. From here, you will look for a device named Xbox. In most cases, that will be the name that shows up. If you do not see a device called Xbox, you will want to look for anything that looks similar such as Microsoft or gaming.
From here, you will want to record the IP address of your Xbox console. Once you have recorded the IP address, you are good to go. Enter that IP address into your remote play application, and you will hopefully be able to connect.
If your Xbox doesn’t show up, make sure it is powered on and connected to your network. If you are still having trouble, try temporarily setting your Xbox right beside your router and plugging it in with a short ethernet patch cable. This will ensure your console is connected to your network. If you don’t have an ethernet cable, you can purchase one very affordably.

Optional: Set Up a Static IP Address
From here, you will want to set up your Xbox One or Series X | S console with a static IP address. Once you assign a static IP address, your IP address will never change. This way, you simply need to make note of this IP address, and you will always be able to connect.
This step is optional but highly recommended for sure. There are a couple of different ways of setting up a static IP address on your Xbox. The best way is to use a DHCP reservation on your router.
FAQ
What does Xbox IP address look like
Your Xbox IP address, in most cases, will be a private IP address that begins with either 192.168 or 10. There are other possibilities, but these private IP addresses are by far the most common. An IPv6 address on Xbox will look like a much longer value consisting of both numbers and letters A-F.
How to find your Xbox One IP address without turning it on
You can either use an IP scanner tool, or you can use the Xbox Companion app to view your console’s IP address on your PC. Having an IP scanner tool on your PC is useful for other things as well. The computer and Xbox must be connected to the same network either via ethernet or Wi-Fi. You will not need to connect your Xbox One to a TV for this to work.
How to get Xbox IP address without tv
Connect your Xbox to the same network as your computer. Run an IP scan using an IP scanner utility. It will show the IP address of your Xbox. You can also do this on your smartphone using an IP scanner app for Android / iPhone. You will need your Xbox powered on for this to work.
Find Xbox IP address from computer
You can either use an IP scanner tool, or you can use the Xbox Companion app to view your console’s IP address on your PC. Having an IP scanner tool on your PC is useful for other things as well. The computer and Xbox must be connected to the same network, either via ethernet or Wi-Fi. You will not need to connect your Xbox to a TV for this to work, but your Xbox will need to be powered on.